Top Social

create classic children's clothing

Image Slider

Mori Tour - The Crazy Tailor

Wednesday, April 20, 2016
Isn't this linen Mori Dress lovely? It's made by Sarah from The Crazy Tailor where the tour makes its next stop today.

To see more delightful creations from this talented lady, head over to The Crazy Tailor.

Mori Tour - Sweeter Than Cupcakes

Tuesday, April 19, 2016
The Mori Dress Tour continues with a visit to Courtney's blog: Sweeter Than Cupcakes.  It's always a treat to have Courtney sew one of my patterns because the result is always extra special.


To see more of this beautiful dress and all of the other amazing outfits, head over to Sweeter Than Cupcakes.


Mori Tour - Glitter + Wit

Monday, April 18, 2016
This week is full of Mori Dress awesomeness starting with the amazing Tasha from Glitter + Wit. She's taken the Mori to a new level with her clever alteration to the flounces.


More photos and info on Tasha's Mori top at Glitter + Wit. Make sure to check out all the other incredible garments she's made!

Mori Tour - Paisley Roots

Monday, April 11, 2016
What a treat to get to share this incredible Mori Dress made by Karly from Paisley Roots!
Her impeccable stripe matching makes for a very striking one-of-a-kind dress. No wonder her adorable daughter is looking so fierce! That's one fierce looking Mori!


Don't miss out on all the details.  Head over to Paisley Roots!


Mori Tour - Sew, Straight & Gather

Wednesday, April 6, 2016
Today the Mori is over at Sew Straight & Gather where Terri, one of my favourite fellow Canadian designers, has made a gorgeous top for her sweet girl.  Isn't the contrasting bodice beautiful?!


Head over to Sew Straight & Gather to see more and don't forget to check out Terri's amazing patterns!

Mori Tour - Sewing Mama RaeAnna

Monday, April 4, 2016
The Mori Dress & Top is touring some of my favourite places in blogland this month (with a coupon code no less!).  From what I've seen so far, I'm sure you will be amazed and inspired by what these talented ladies have created with the Mori pattern.

Sewing Mama RaeAnna is the first stop on the tour.  RaeAnna has such a gift when it comes to sewing for her adorable children, and did you know she and I have something else in common?  We are both music teachers!  So now you know some blogger trivia, but more importantly, check out this embroidered Easter Mori Dress modelled by sweet Eva Mae.


And while you're at Sewing Mama RaeAnna, make sure to check out all the stunning photos from the family photoshoot by the cherry blossoms.  They are amazing!  

Adding Trim to Garments

Thursday, March 31, 2016


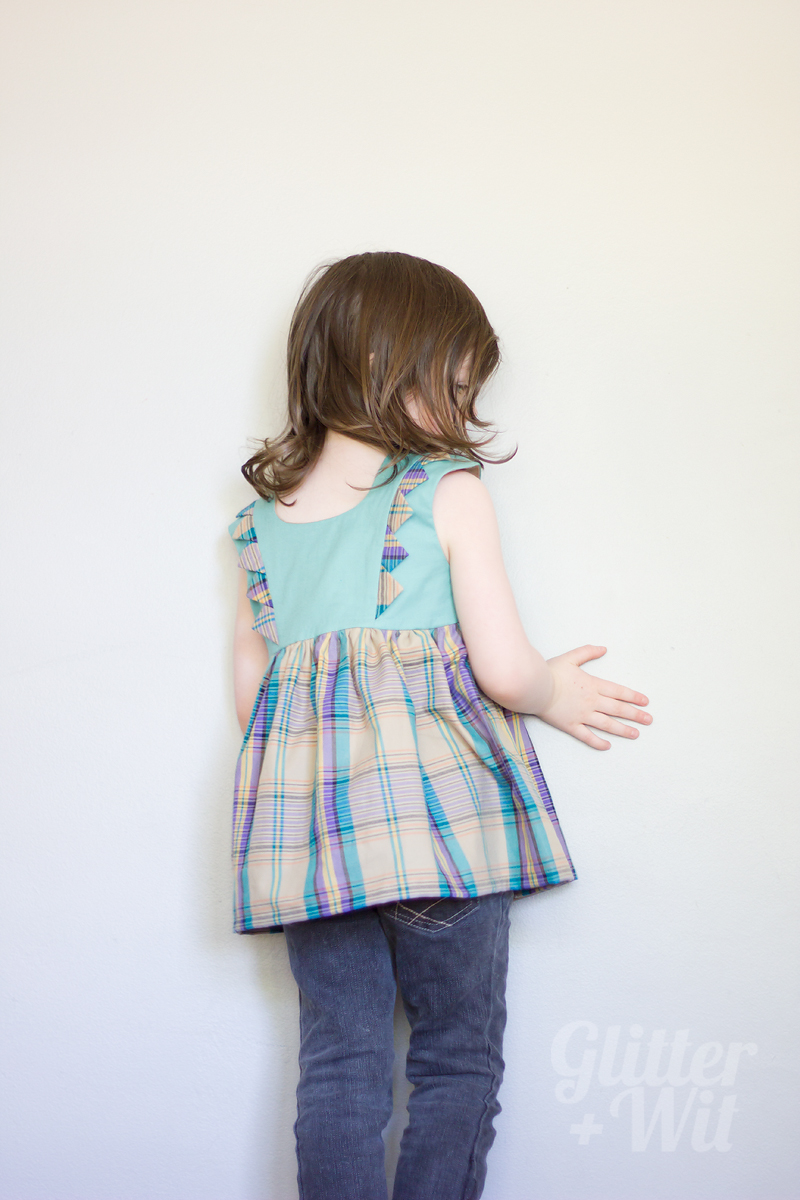
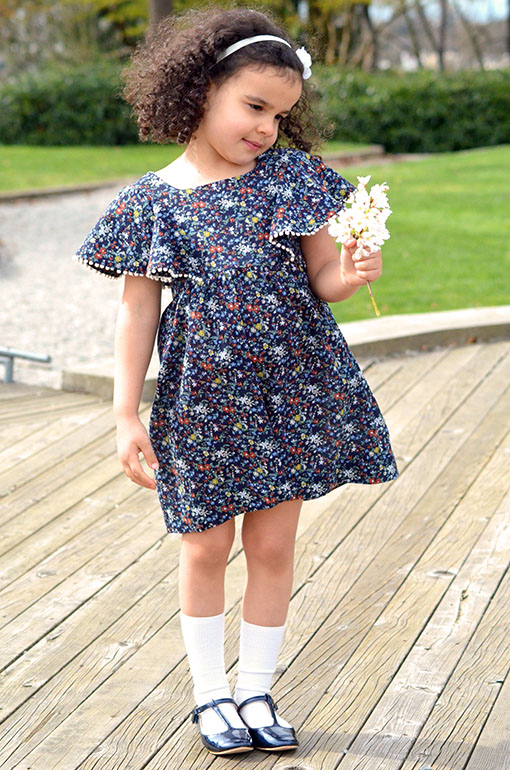
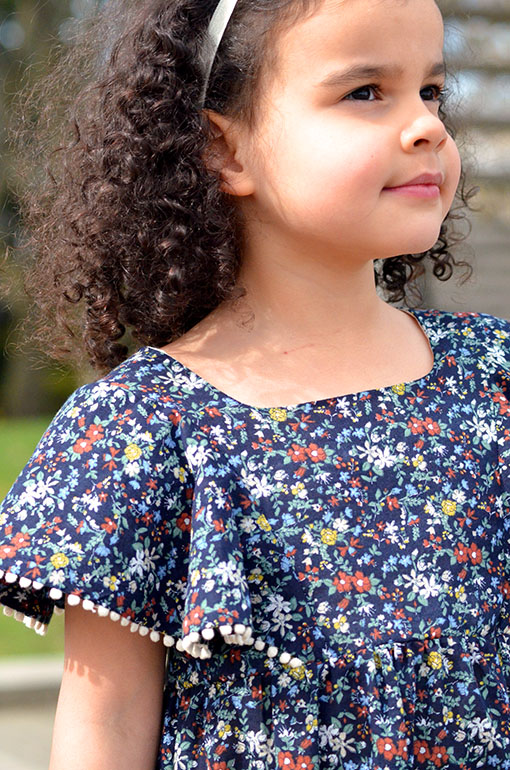
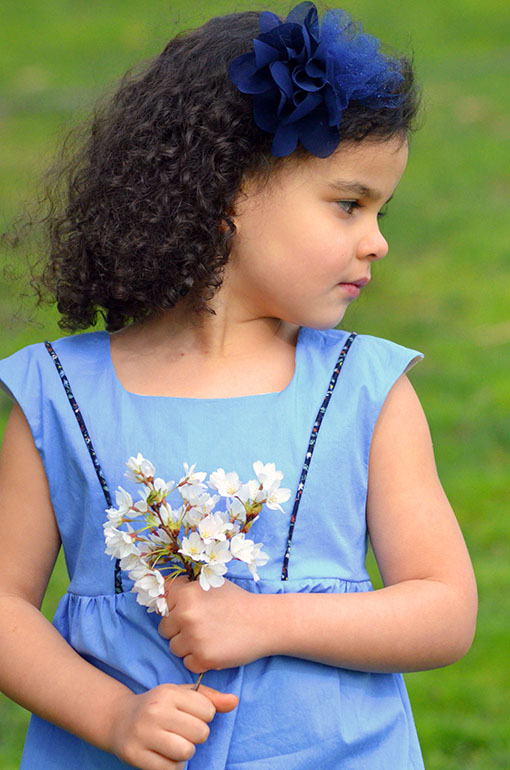
Adding trim is a very easy way to personalize a garment and make it completely your own.  There are many types of trim, but the ones I will be using in this tutorial are piping and crocheted pom poms.

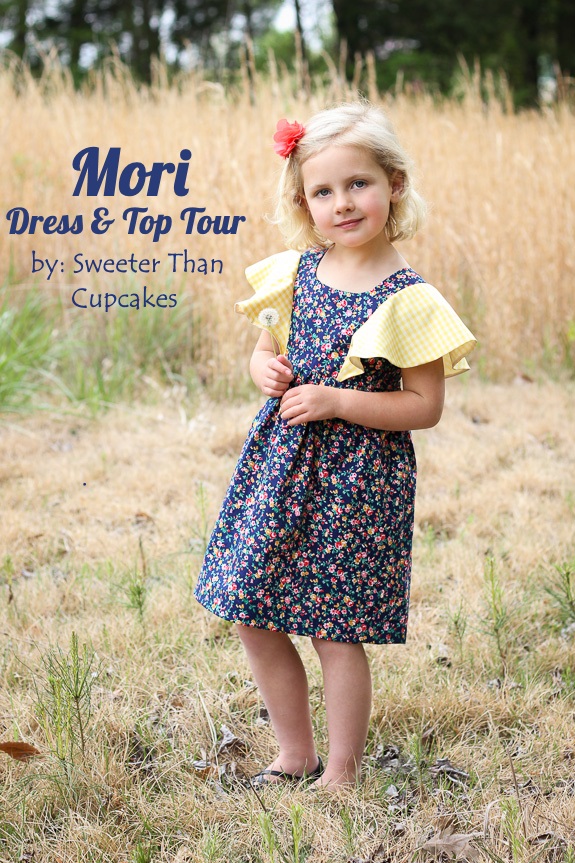
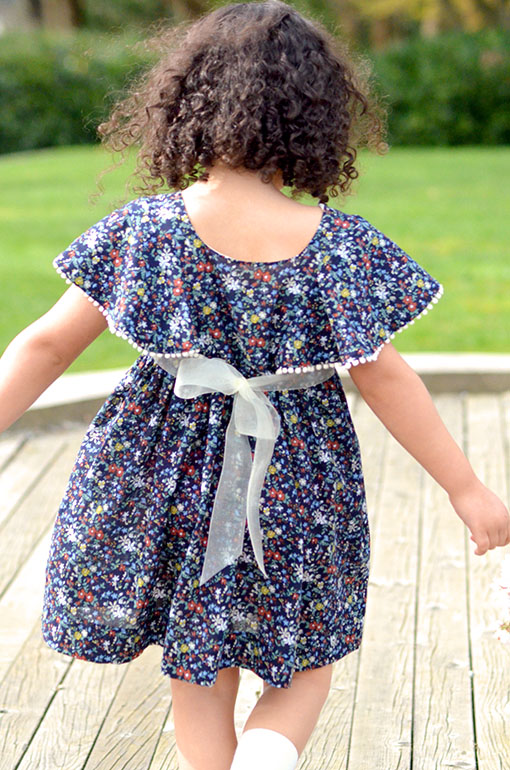
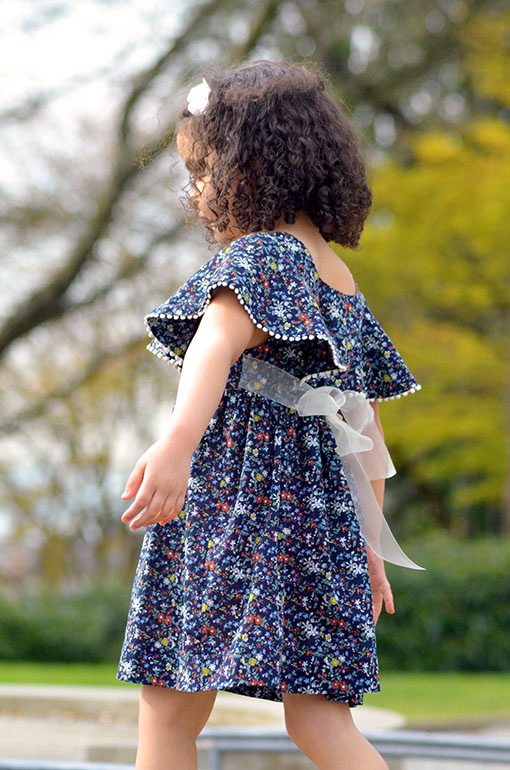
Lined sleeves and/or flounces are a perfect place to add trim, so I will be attaching my crocheted pom poms to the flounce of the Mori Dress.  This technique will work on any lined sleeve (flutter or cap sleeves look great with trim) or flounces.

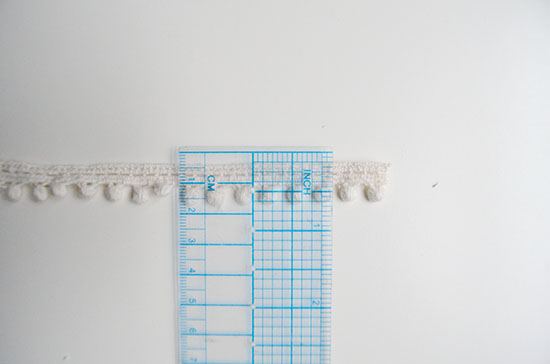
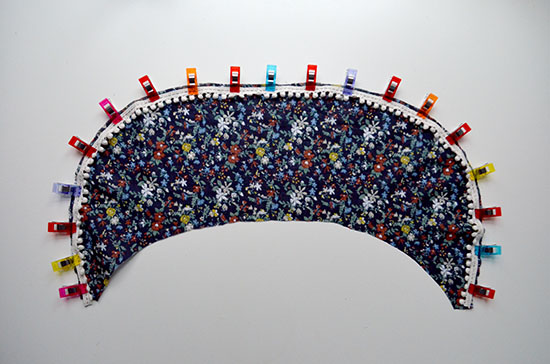
1.  Measure your trim to determine how much of it you want to show on the right side of your garment.  Since I want only the pompoms to show, I will need to place my trim 0.25" (or 0.3cm) from the raw edge of the flounce (because of the 3/8"/1cm seam allowance).


2.  Pin the trim to the right side of the flounce.  As you can see, mine is placed 0.25" (or 0.3cm) from the raw edge.  Baste trim in place.


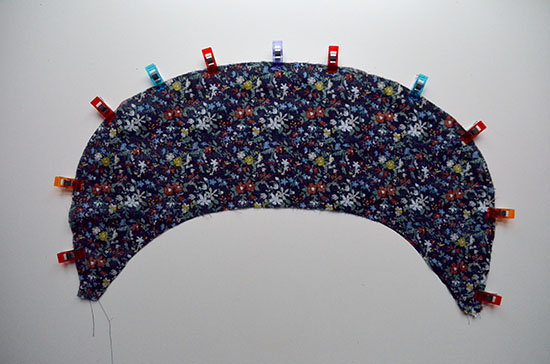
3.  Place the other flounce piece, right sides together.  Pin and stitch.


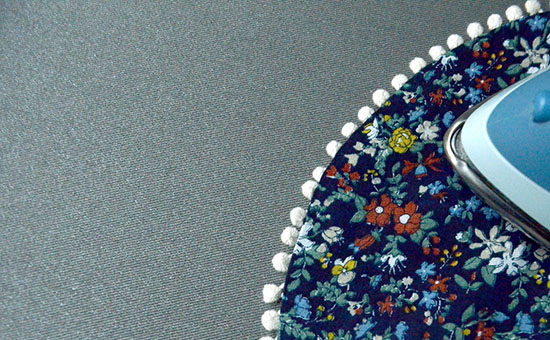
4.  Turn right sides out, and press.


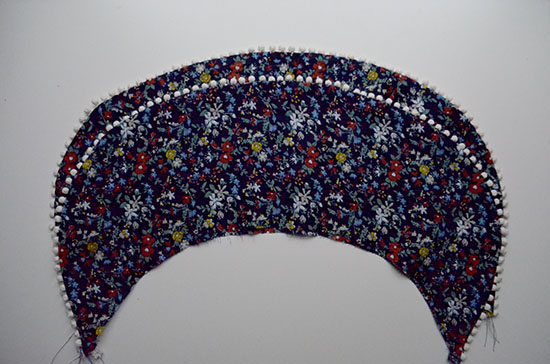
5.  Repeat steps 1-4 with opposite flounce and continue with the rest of your garment.


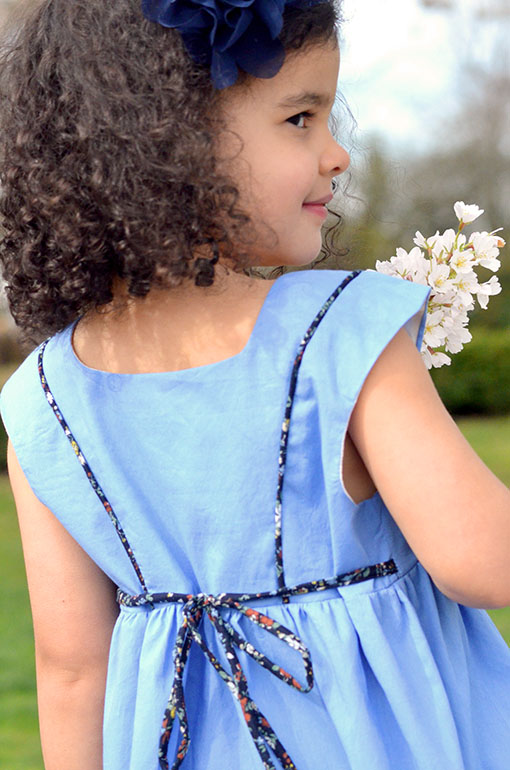
Princess seams are also the perfect place to add some trim.  Here is how I added piping to the princess seams of the Mori Dress (omitting the flounces).  The steps are basically identical to the instructions above.

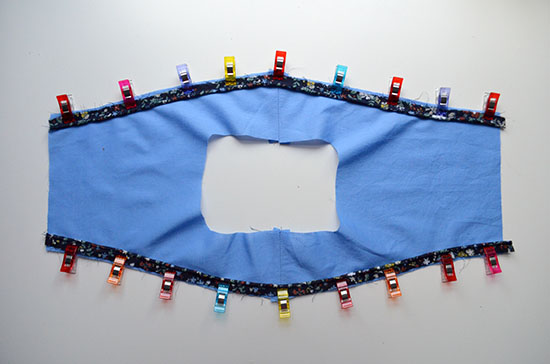
1.  Pin piping to centre front and back pieces.  Baste in place.  You may find it helpful to use a zipper foot.


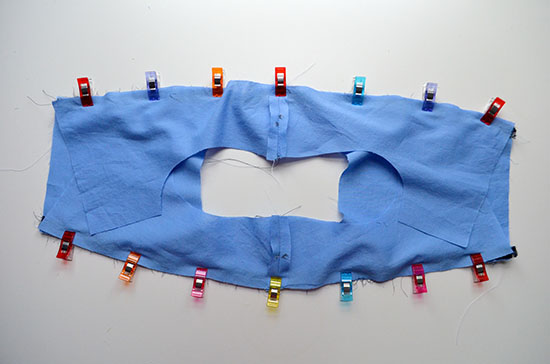
2.  Pin side front and back pieces, right sides together.  Stitch.


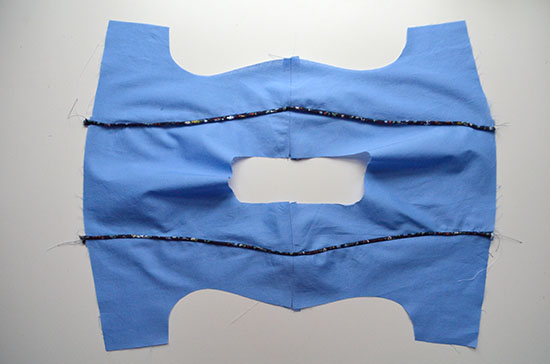
 3.  Press and follow the remaining steps to complete your garment.


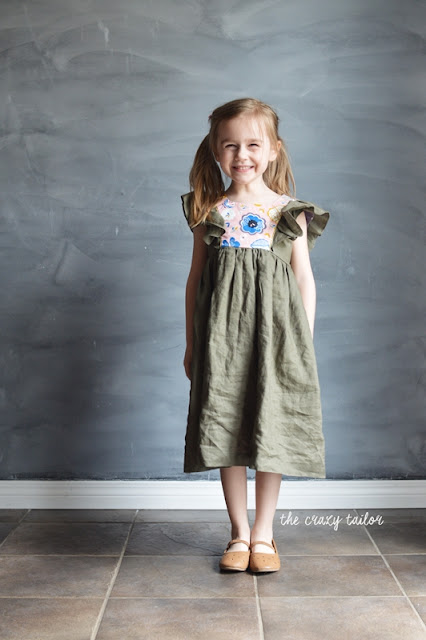
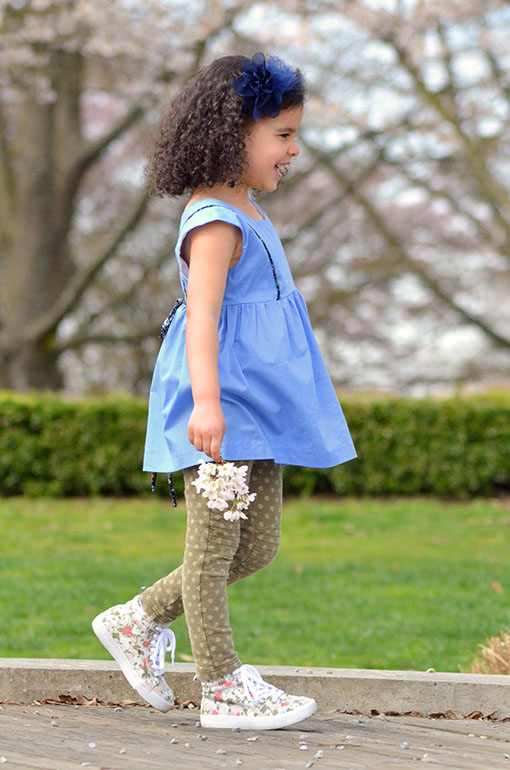
Here are the results of personalizing with trim.  As you can see, the added detail makes these garments truly one-of-a-kind!


This tutorial was originally posted on Project Run & Play.

Auto Post Signature

Auto Post  Signature